Getting to Know the Alpha 7 III
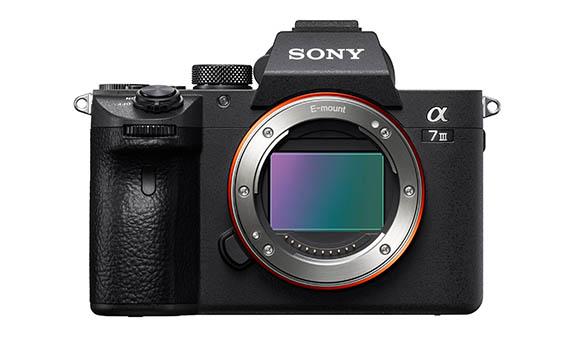
The perfect combination of speed, resolution, and features make the Alpha 7 III the ideal camera to recommend for any kind of photography and videography. It gives you the power, precision and flexibility to capture day-to-day moments however you like.
An excellent all-rounder camera comes with superb resolution, a powerful AF system, 10 fps shooting and 4K video. If you’ve just got your hands on one and are raring to go, here’s a set-up guide to make your experience a breeze.
Top dials and buttons
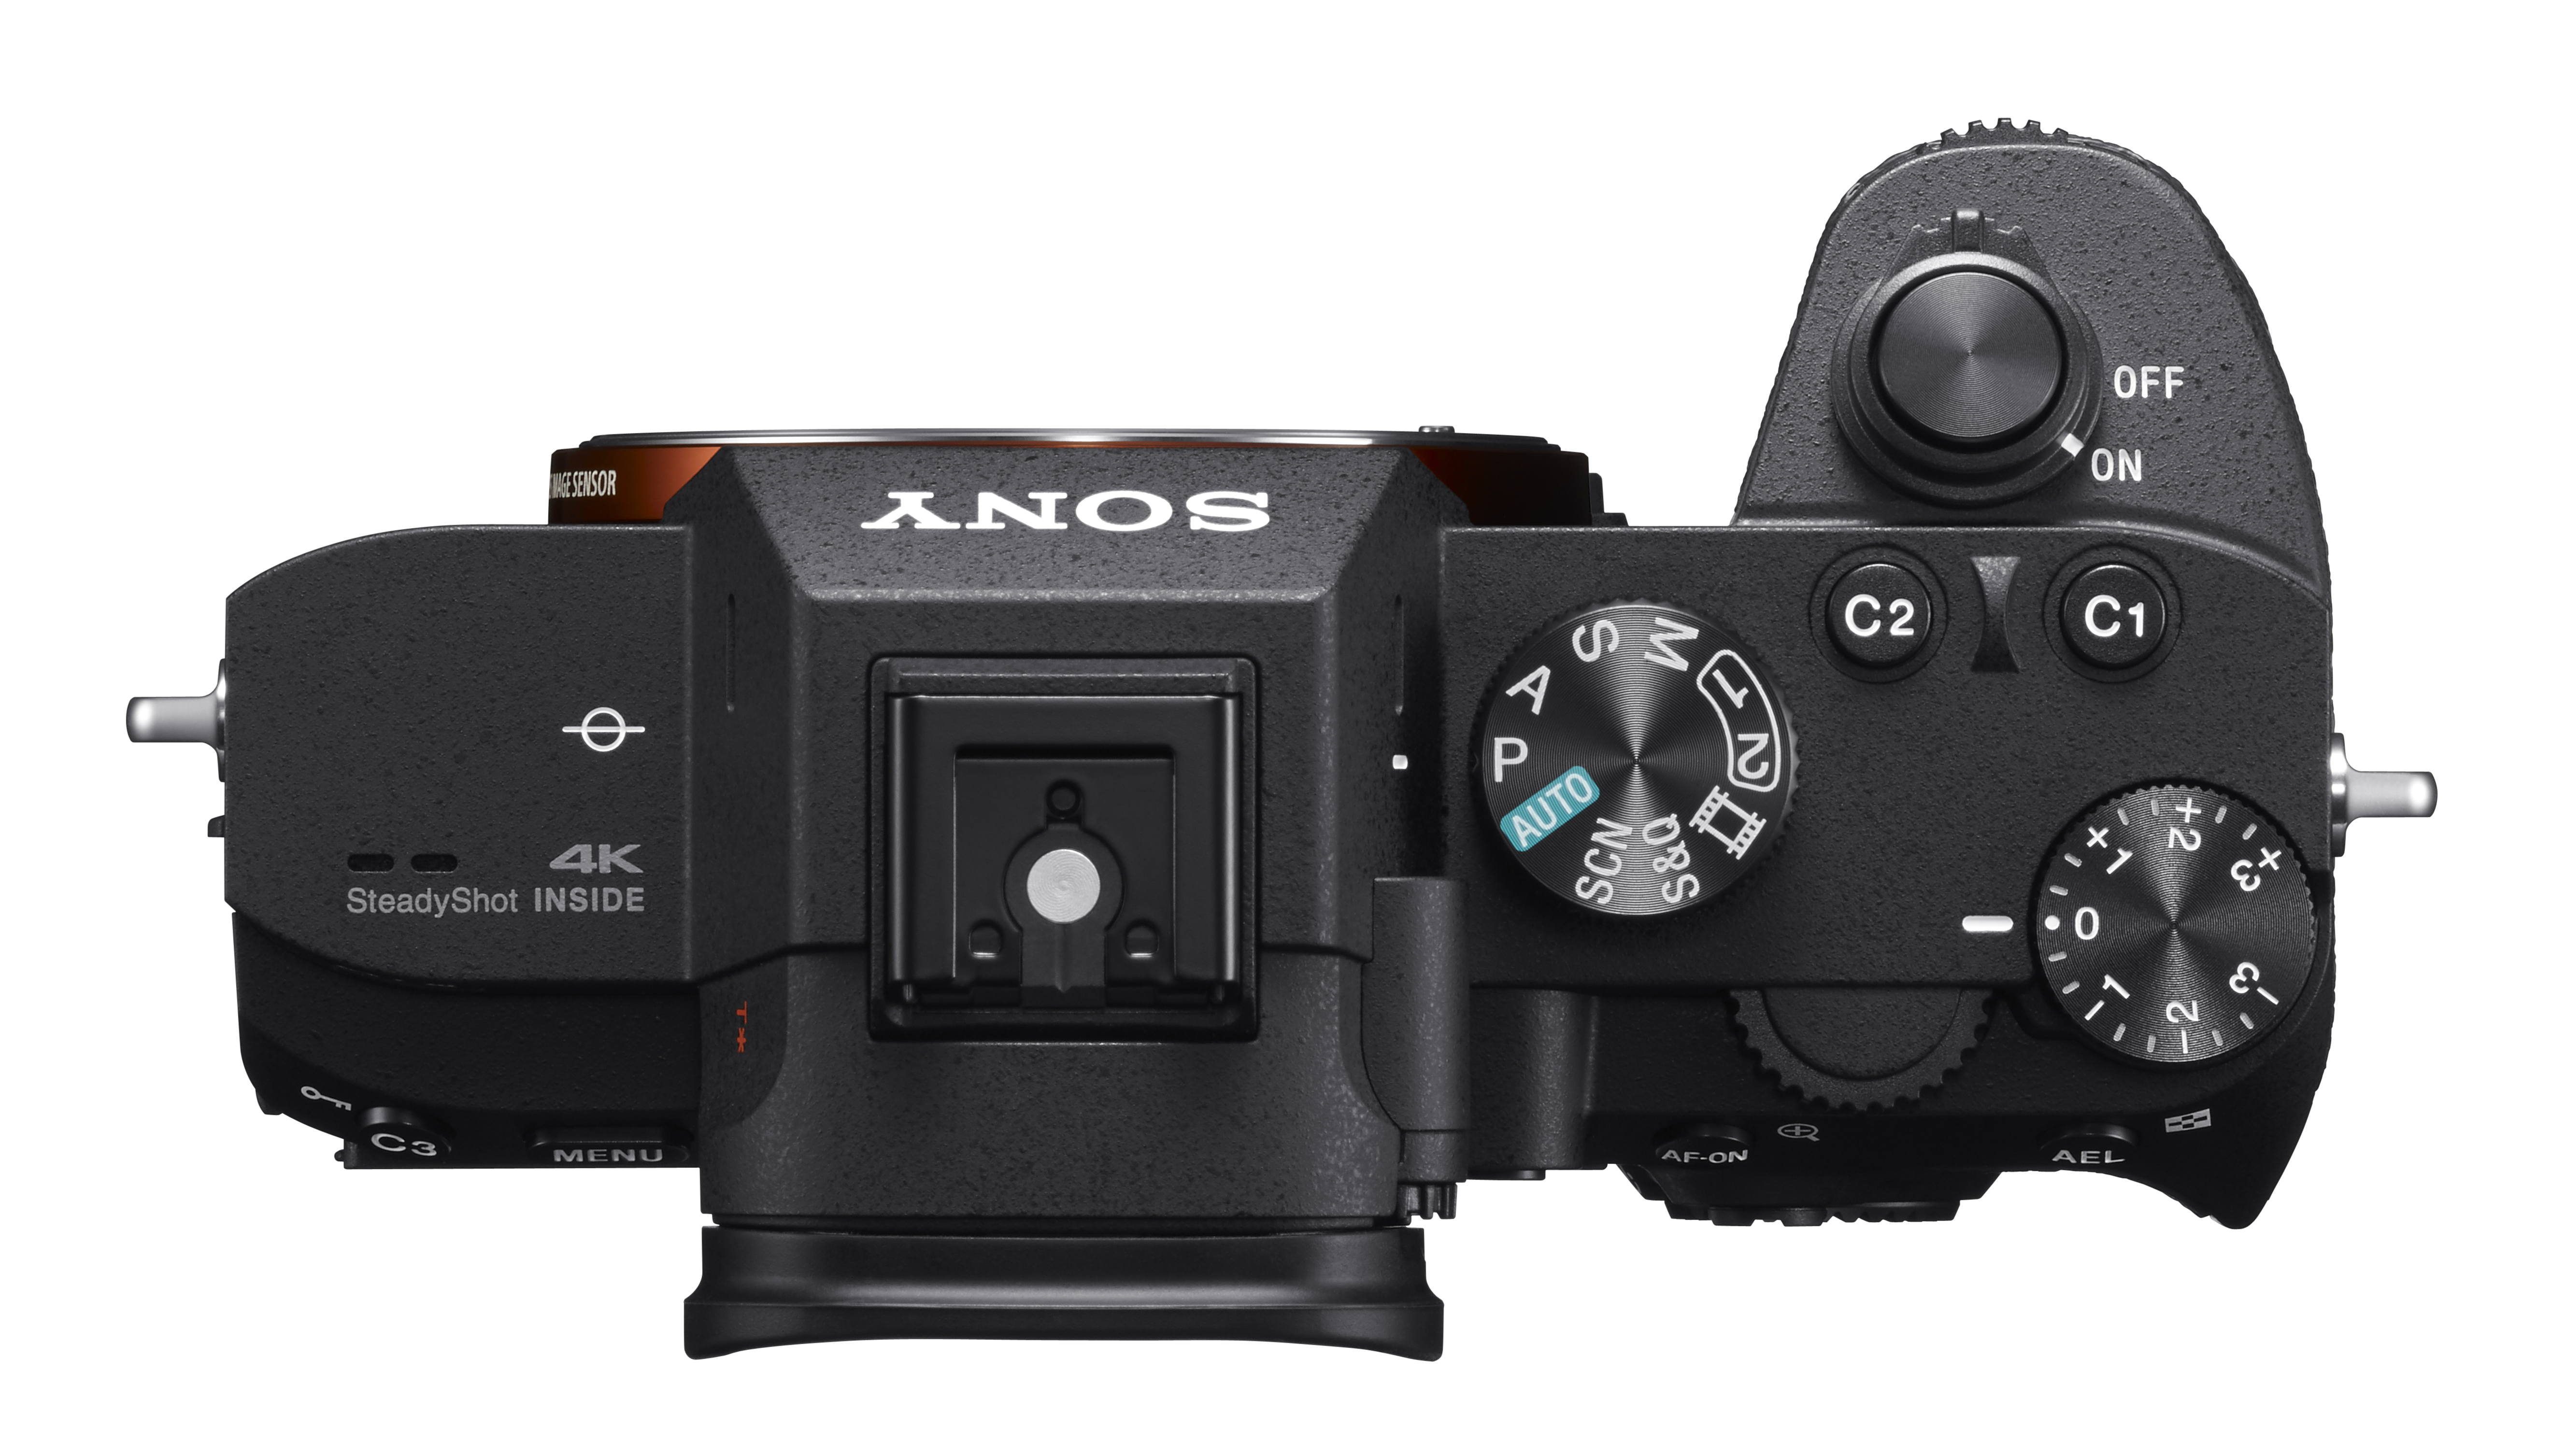
If you look at the top of the camera, you’ll see the mode dial on the right, a shutter button, the ON/OFF collar, a dedicated exposure compensation dial, and two custom buttons.
The camera mode dial has ten different modes for you to choose from. The Manual (M) mode gives you the most control over your camera settings. The dial also has a Memory Recall (MR) feature labelled as 1 and 2, enabling you to store specific settings for different situations and assign them to one of the two MR options on the dial. It is handy and efficient for a quick change of settings.
The second dial with numbers on it is the exposure compensation dial. This dial can be used with the A, S or P modes to change the exposure manually.
The custom buttons (C1 & C2) are by default used to set your White Balance (C1) and Focus Area (C2), though you can set these custom buttons to any other setting you want, such as ISO, if you so desire.
Rear buttons
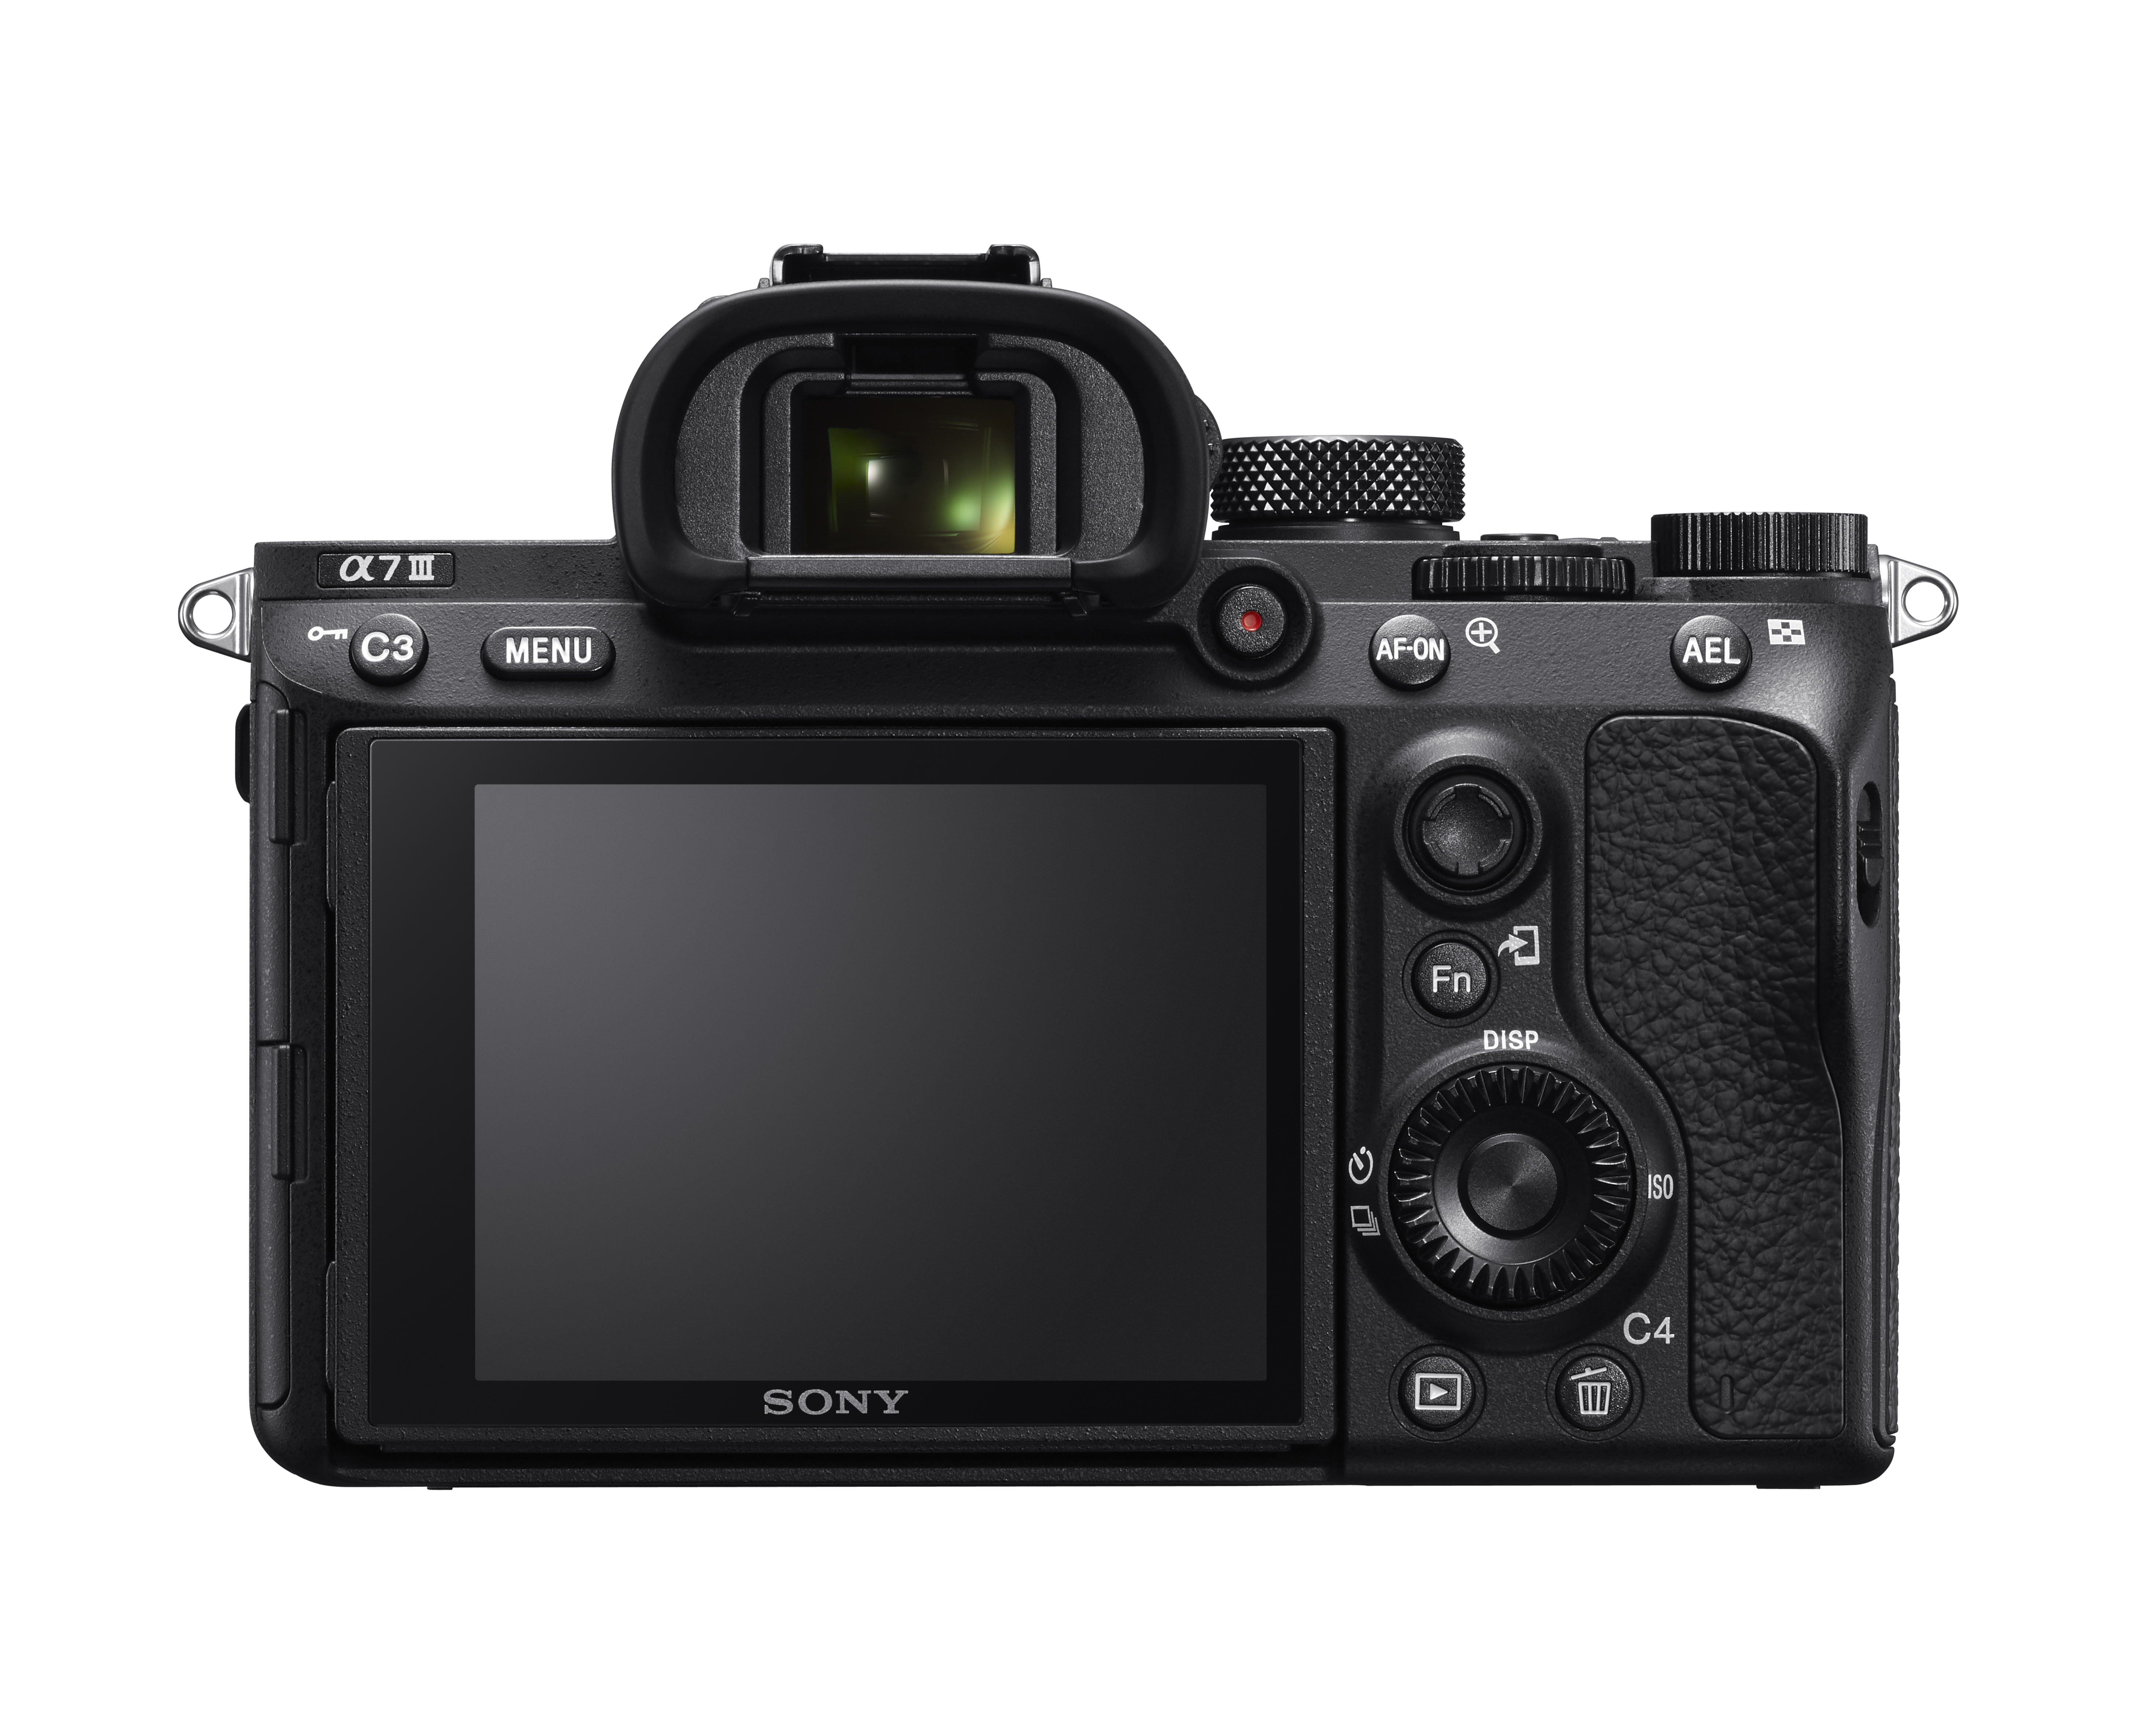
On the back of the camera, you will find the third custom button (C3) next to the MENU button on the left side. The movie recording button is located next to the EVF at the top. If you dislike jumping between the EVF and the LCD screen, a good tip would be to set one of your custom buttons as a manual toggle button between the EVF/LCD screen.
Moving along the camera's right side, there are dedicated AF-ON and AEL buttons. The AF-ON button is for photographers who wish to use back-button focus instead of the shutter button. The AEL is for locking exposure.
Just below the AF-ON button is the joystick which grants control over the camera’s autofocus points and below the joystick is the Function (Fn) button. This button pulls up a mini menu where you can quickly adjust your main camera settings like your ISO, White Balance, Drive and Focus modes, exposure compensation, and flash mode. Further down is the multi-functional selection wheel that allows you to navigate through menus as well as access to specific menus by pressing all four corners.
We have finally come to the Playback and C4 / Trash buttons. Playback enables you to playback images on the LCD, and the C4 / Trash button can be used to delete unwanted photos during playback. When the camera is not on Playback mode, the C4 serves as another custom button.
And that’s the end of the tour of the Alpha 7 III! It is an excellent camera for entry-level photographers with its myriad of features and has a lot of versatility to offer when you take the time to get to know your camera.

